
How to Install Eventixa on WordPress
Eventixa can be installed directly from the WordPress plugin directory or by uploading the plugin ZIP file manually.
This guide explains how to install and activate Eventixa Core and verify that the plugin is ready to use.
Available in: Eventixa Core
Location: Plugins → Add New Plugin
Next step: Eventixa Setup Wizard
Before You Begin
Make sure you have:
- A working WordPress website
- Administrator access
- Permission to install WordPress plugins
If you plan to use Eventixa Pro, install and activate Eventixa Core first.
Install Eventixa from WordPress
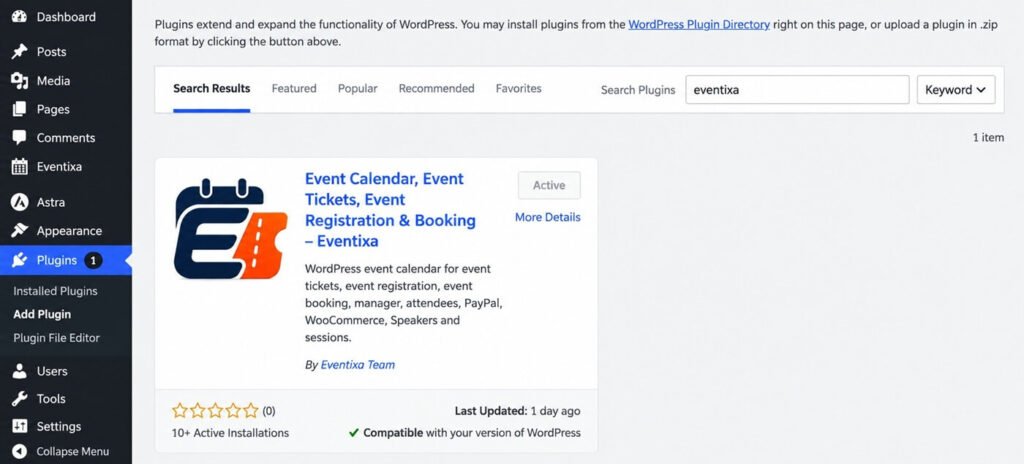
The easiest way to install Eventixa is from the WordPress plugin directory.
- Go to Plugins → Add New Plugin.
- Search for Eventixa.
- Find Eventixa – Events Calendar, Tickets & Bookings.
- Click Install Now.
- After installation, click Activate.
Eventixa will now be active on your WordPress website.
Install Eventixa Using a ZIP File
If you have the Eventixa plugin ZIP file:
- Go to Plugins → Add New Plugin.
- Click Upload Plugin.
- Select the Eventixa ZIP file.
- Click Install Now.
- After installation, click Activate Plugin.
Do not extract the ZIP file before uploading it.
Verify the Installation
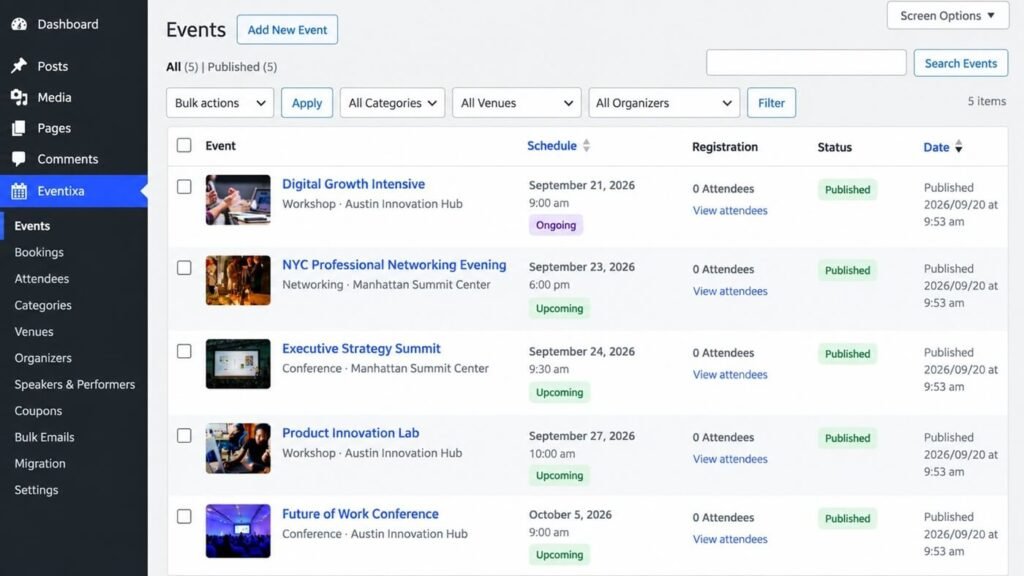
After activation, a new Eventixa menu should appear in the WordPress dashboard.
You should be able to access areas such as:
- Events
- Bookings
- Attendees
- Categories
- Venues
- Organizers
- Speakers & Performers
- Coupons
- Bulk Emails
- Settings
- Shortcodes
- Extensions
- Setup Guide
- Migration
Additional features can appear when Eventixa Pro is active.
Complete the Initial Setup
After activating Eventixa, continue with the Setup Wizard.
Go to: Eventixa → Setup Guide
The wizard helps configure important settings such as:
- Timezone
- Date format
- Time format
- Event display
- Guest checkout
- Currency
- Payment options
You can change these settings later from Eventixa → Settings.
Installing Eventixa Pro
If you use Eventixa Pro, keep Eventixa Core installed and active.
Then install the Pro plugin separately.
For complete instructions, see How to Install and Activate Eventixa Pro.
Troubleshooting
Eventixa Menu Does Not Appear
Check that:
- Eventixa is activated under Plugins → Installed Plugins.
- You are logged in with an administrator account.
- The WordPress dashboard has been refreshed.
WordPress Cannot Install the Plugin
Make sure you are uploading the original Eventixa plugin ZIP file.
Do not upload:
- An extracted plugin folder
- A documentation ZIP
- A ZIP containing unrelated files
Eventixa Pro Does Not Work
Eventixa Pro requires Eventixa Core.
Confirm that Eventixa Core is installed and active before activating Pro.
Next Steps
Continue with:


