
Organizers
Eventixa organizers let you create reusable profiles for the person, company, team, or organization responsible for an event.
Once created, an organizer can be assigned to multiple events so you do not need to enter the same information repeatedly.
Available in: Eventixa Core
Location: Eventixa → Organizers
Used by: Event creation and event details
Open the Organizers Screen
Go to: Eventixa → Organizers
From here, you can:
- Create a new organizer
- Edit existing organizers
- Review organizer details
- Reuse organizers across multiple events
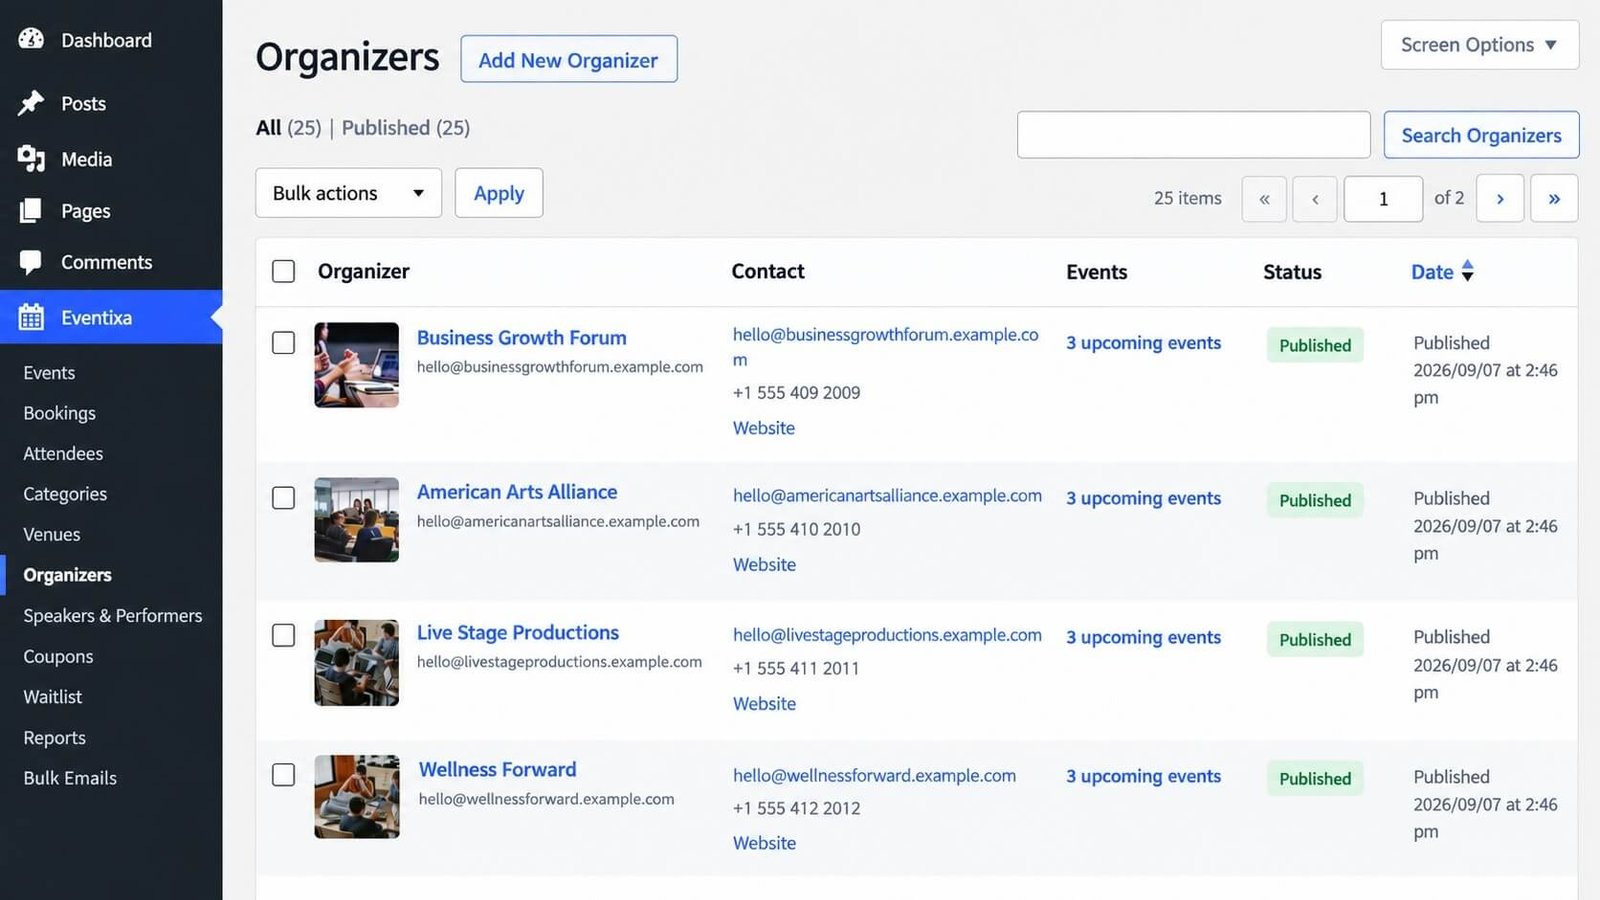
Create a New Organizer
To create an organizer:
- Go to Eventixa → Organizers.
- Click Add New Organizer.
- Enter the organizer name.
- Add the available contact and profile information.
- Save the organizer.
The organizer can then be assigned to Eventixa events.
Organizer Name
Use the name visitors should recognize.
Examples:
- Eventixa Team
- Austin Business Network
- Community Learning Center
- Jane Smith
- Digital Growth Association
An organizer can represent either an individual or an organization.
Organizer Details
Depending on the available Eventixa fields, organizer information can include details such as:
- Name
- Description
- Phone
- Website
- Social or profile information
- Featured image or logo
Use accurate public-facing contact information if it will be shown on the event page.
Assign an Organizer to an Event
Edit an event and open: Event Settings → Organizer
Select the organizer you want to associate with the event.
Save or update the event.
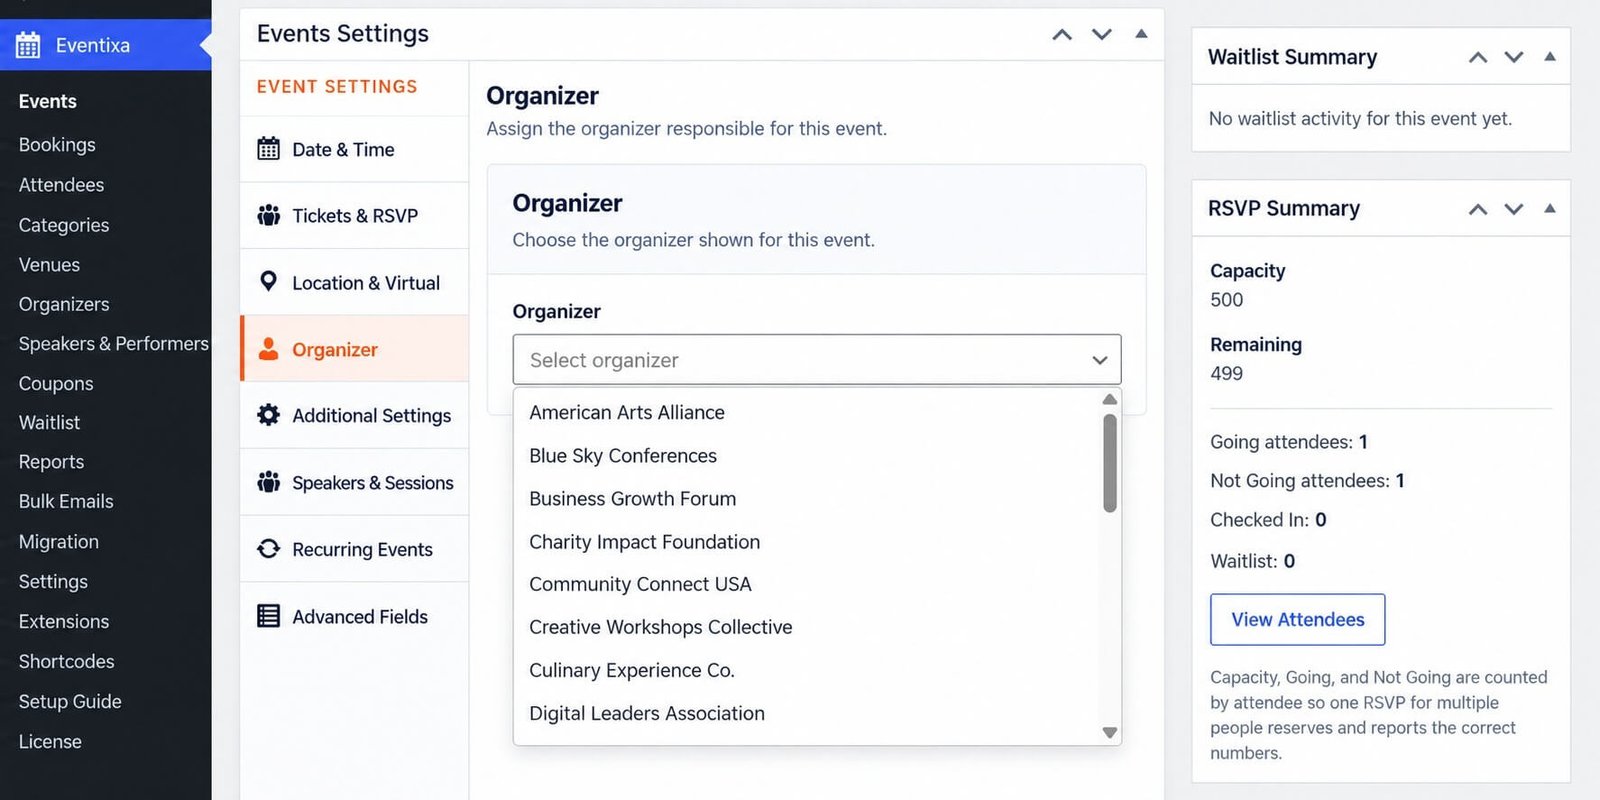
Reuse an Organizer
The same organizer can be assigned to multiple events.
For example: Eventixa Training Team could organize:
- WordPress Workshop
- Event Management Webinar
- Ticketing Masterclass
- Monthly Networking Session
This keeps organizer information consistent across your site.
Multiple Events with the Same Organizer
Reusable organizer profiles are especially useful for:
- Event companies
- Training organizations
- Conference organizers
- Schools and universities
- Community groups
- Agencies
Instead of changing organizer information on every event, update the organizer profile once.
Edit an Existing Organizer
Go to: Eventixa → Organizers
Open the organizer you want to update.
Change the required information and save it.
Because the organizer can be reused, changes may affect multiple events that reference the same profile.
Review important live events before making major changes.
Changing an Organizer on an Event
You can assign a different organizer to an existing event.
Edit the event and open: Event Settings → Organizer
Choose the new organizer and update the event.
If attendees have already registered, consider whether the organizer change affects:
- Event contact information
- Support instructions
- Email communication
- Event ownership or responsibility
Organizer Information on the Frontend
Depending on your Eventixa display configuration, organizer information can appear on the single event page.
This helps visitors understand:
- Who is running the event
- How to contact the organizer
- Where to find more information
The exact frontend presentation depends on your Eventixa and theme setup.
Organizer Images
If Eventixa allows an organizer image or logo, use a clear and consistent image.
Good examples include:
- Company logo
- Organization logo
- Professional headshot
- Team branding image
Avoid low-resolution or unrelated images.
Organizer Naming Best Practices
Use consistent naming throughout your event directory.
Good:
- Eventixa Team
- Riverside Community Center
- Jane Smith
Avoid:
- Main Organizer
- Organizer 1
- Test Organizer
unless those names are genuinely meaningful in your workflow.
Delete an Organizer
Before deleting an organizer, check whether active or upcoming events still use it.
For historical events, keeping the organizer record may be better than deleting it.
Removing an organizer that is still referenced can leave event information incomplete.
Common Organizer Problems
Organizer Does Not Appear in the Event Editor
Check that:
- The organizer has been saved.
- The event editor has been refreshed.
- You are using the correct organizer record.
Wrong Organizer Appears on an Event
Edit the event and open: Organizer
Select the correct organizer and update the event.
Organizer Contact Information Is Outdated
Update the reusable organizer profile.
Any event using that organizer can then use the updated information.
Duplicate Organizer Profiles
Before creating a new organizer, search the existing organizer list.
Use one reusable profile whenever possible instead of creating several nearly identical records.
Before Publishing
Check:
- Organizer name
- Contact information
- Website
- Image or logo
- Event assignment
- Frontend presentation
Then preview the event to make sure the organizer information appears correctly.
Related Documentation
Continue with:


